
Whether designing from a template or completely from scratch, there are a few things you need to know about when creating a custom Wrapped Canvas. The tips in this article will help you understand the Design Guide in Studio and what to expect in your published project.
Various Canvas Sizes:
Wrapped Canvases are fabulous for home decor. They are simple to customize and very easy to display on a wall or other flat surface. Before designing your custom Wrapped Canvas, it is very important to consider the space where you intend to display your finished project, so that you can be sure to choose the correct Canvas size and shape for that space. We offer several different sizes of Wrapped Canvas prints, including two sizes that have a deep wooden frame. More information on the deep frames can be found later in this article.
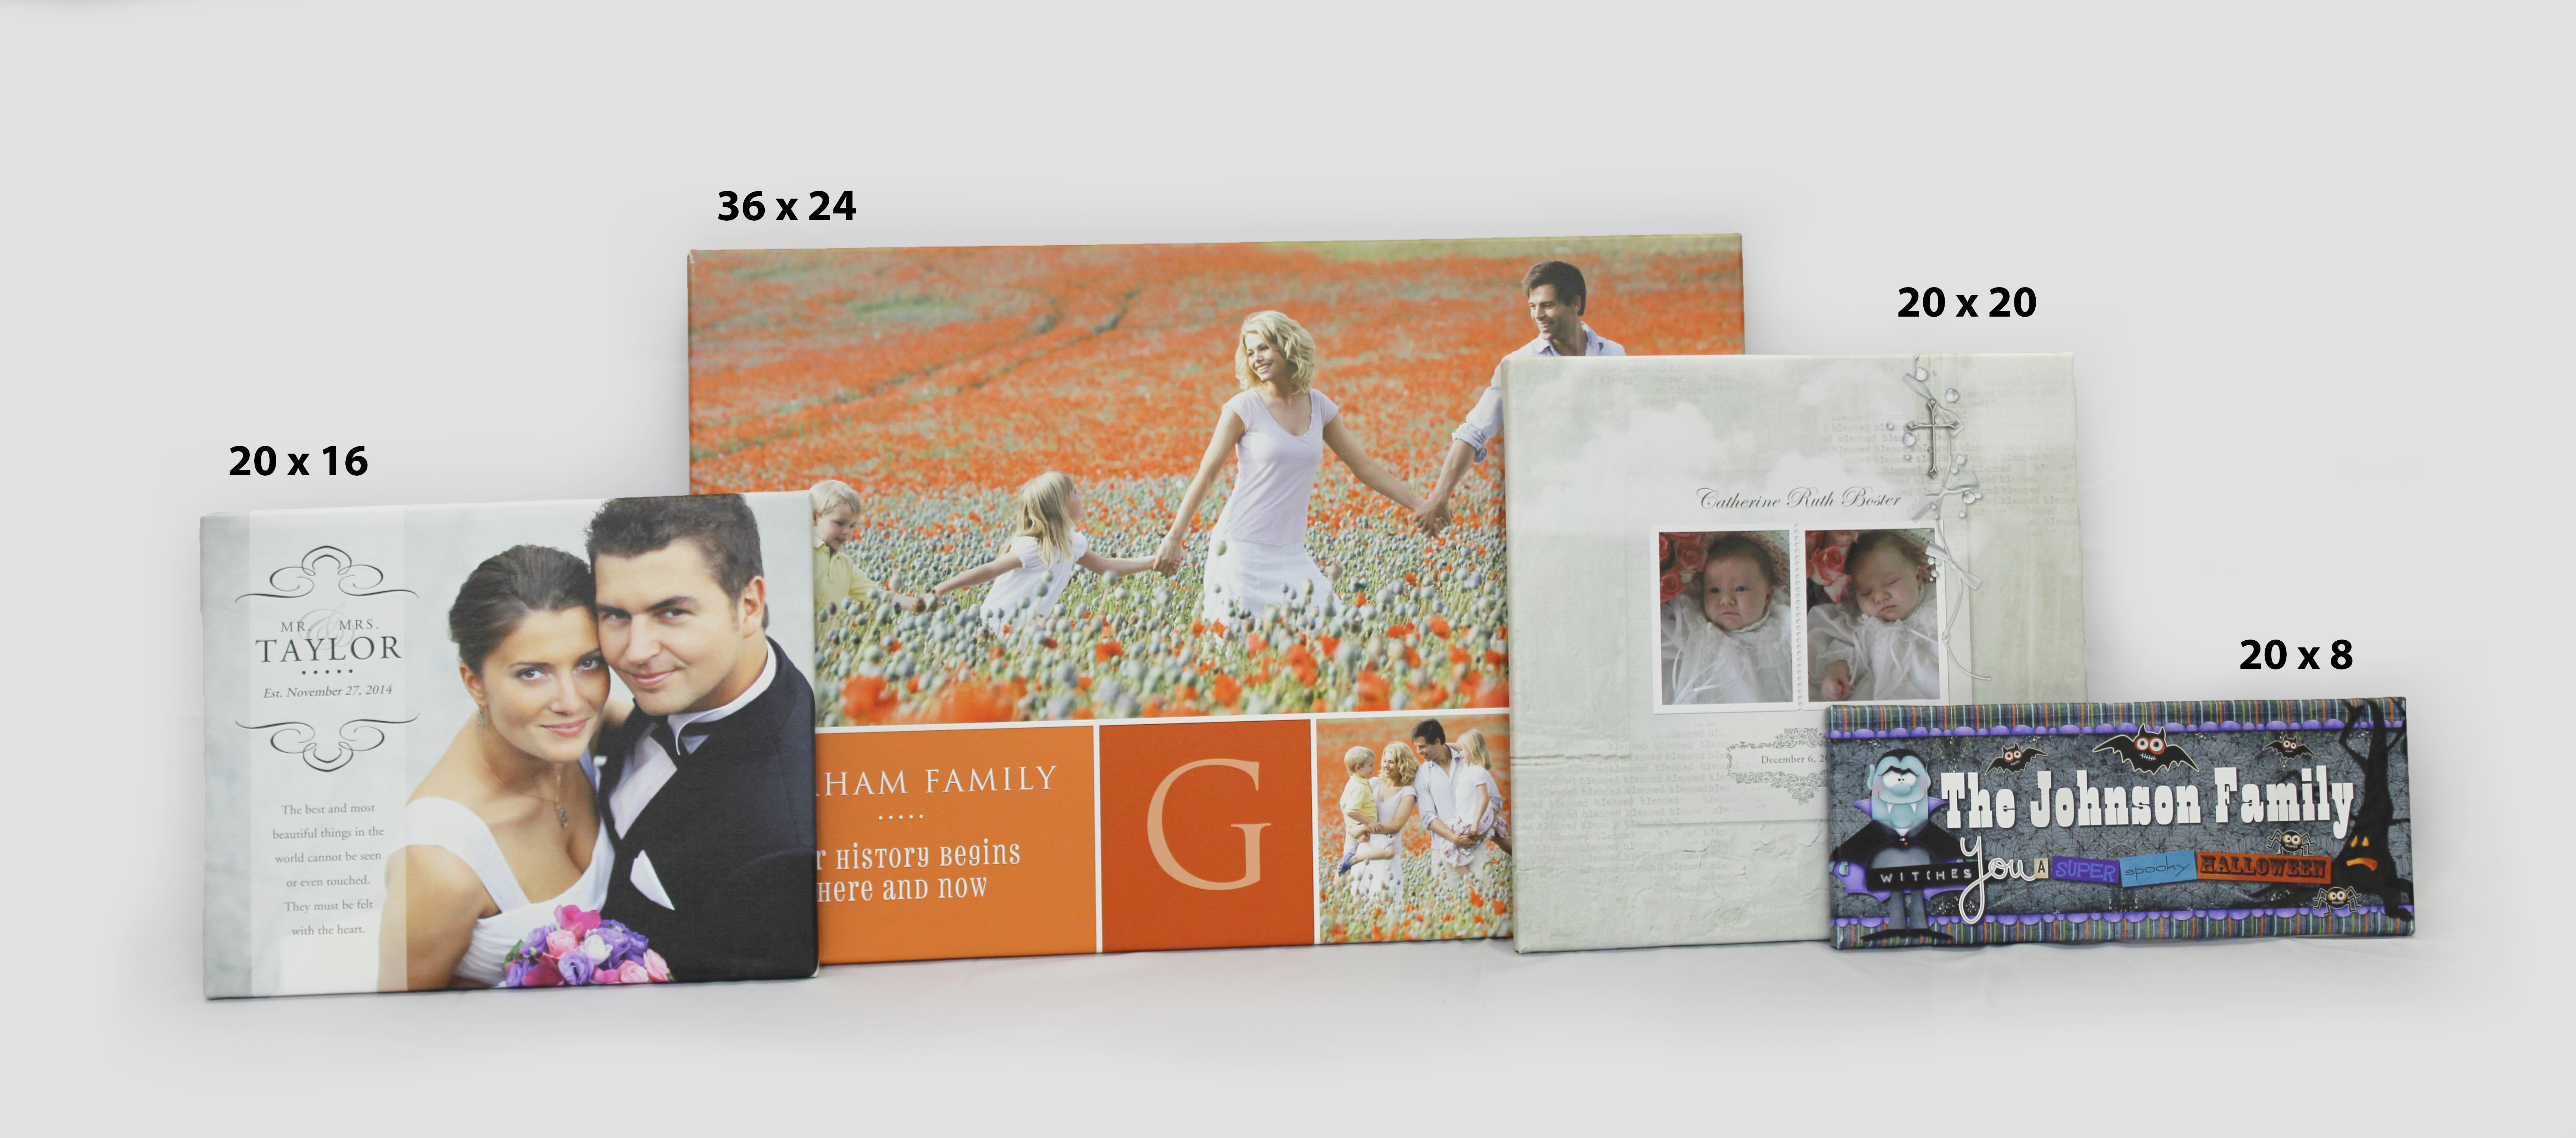
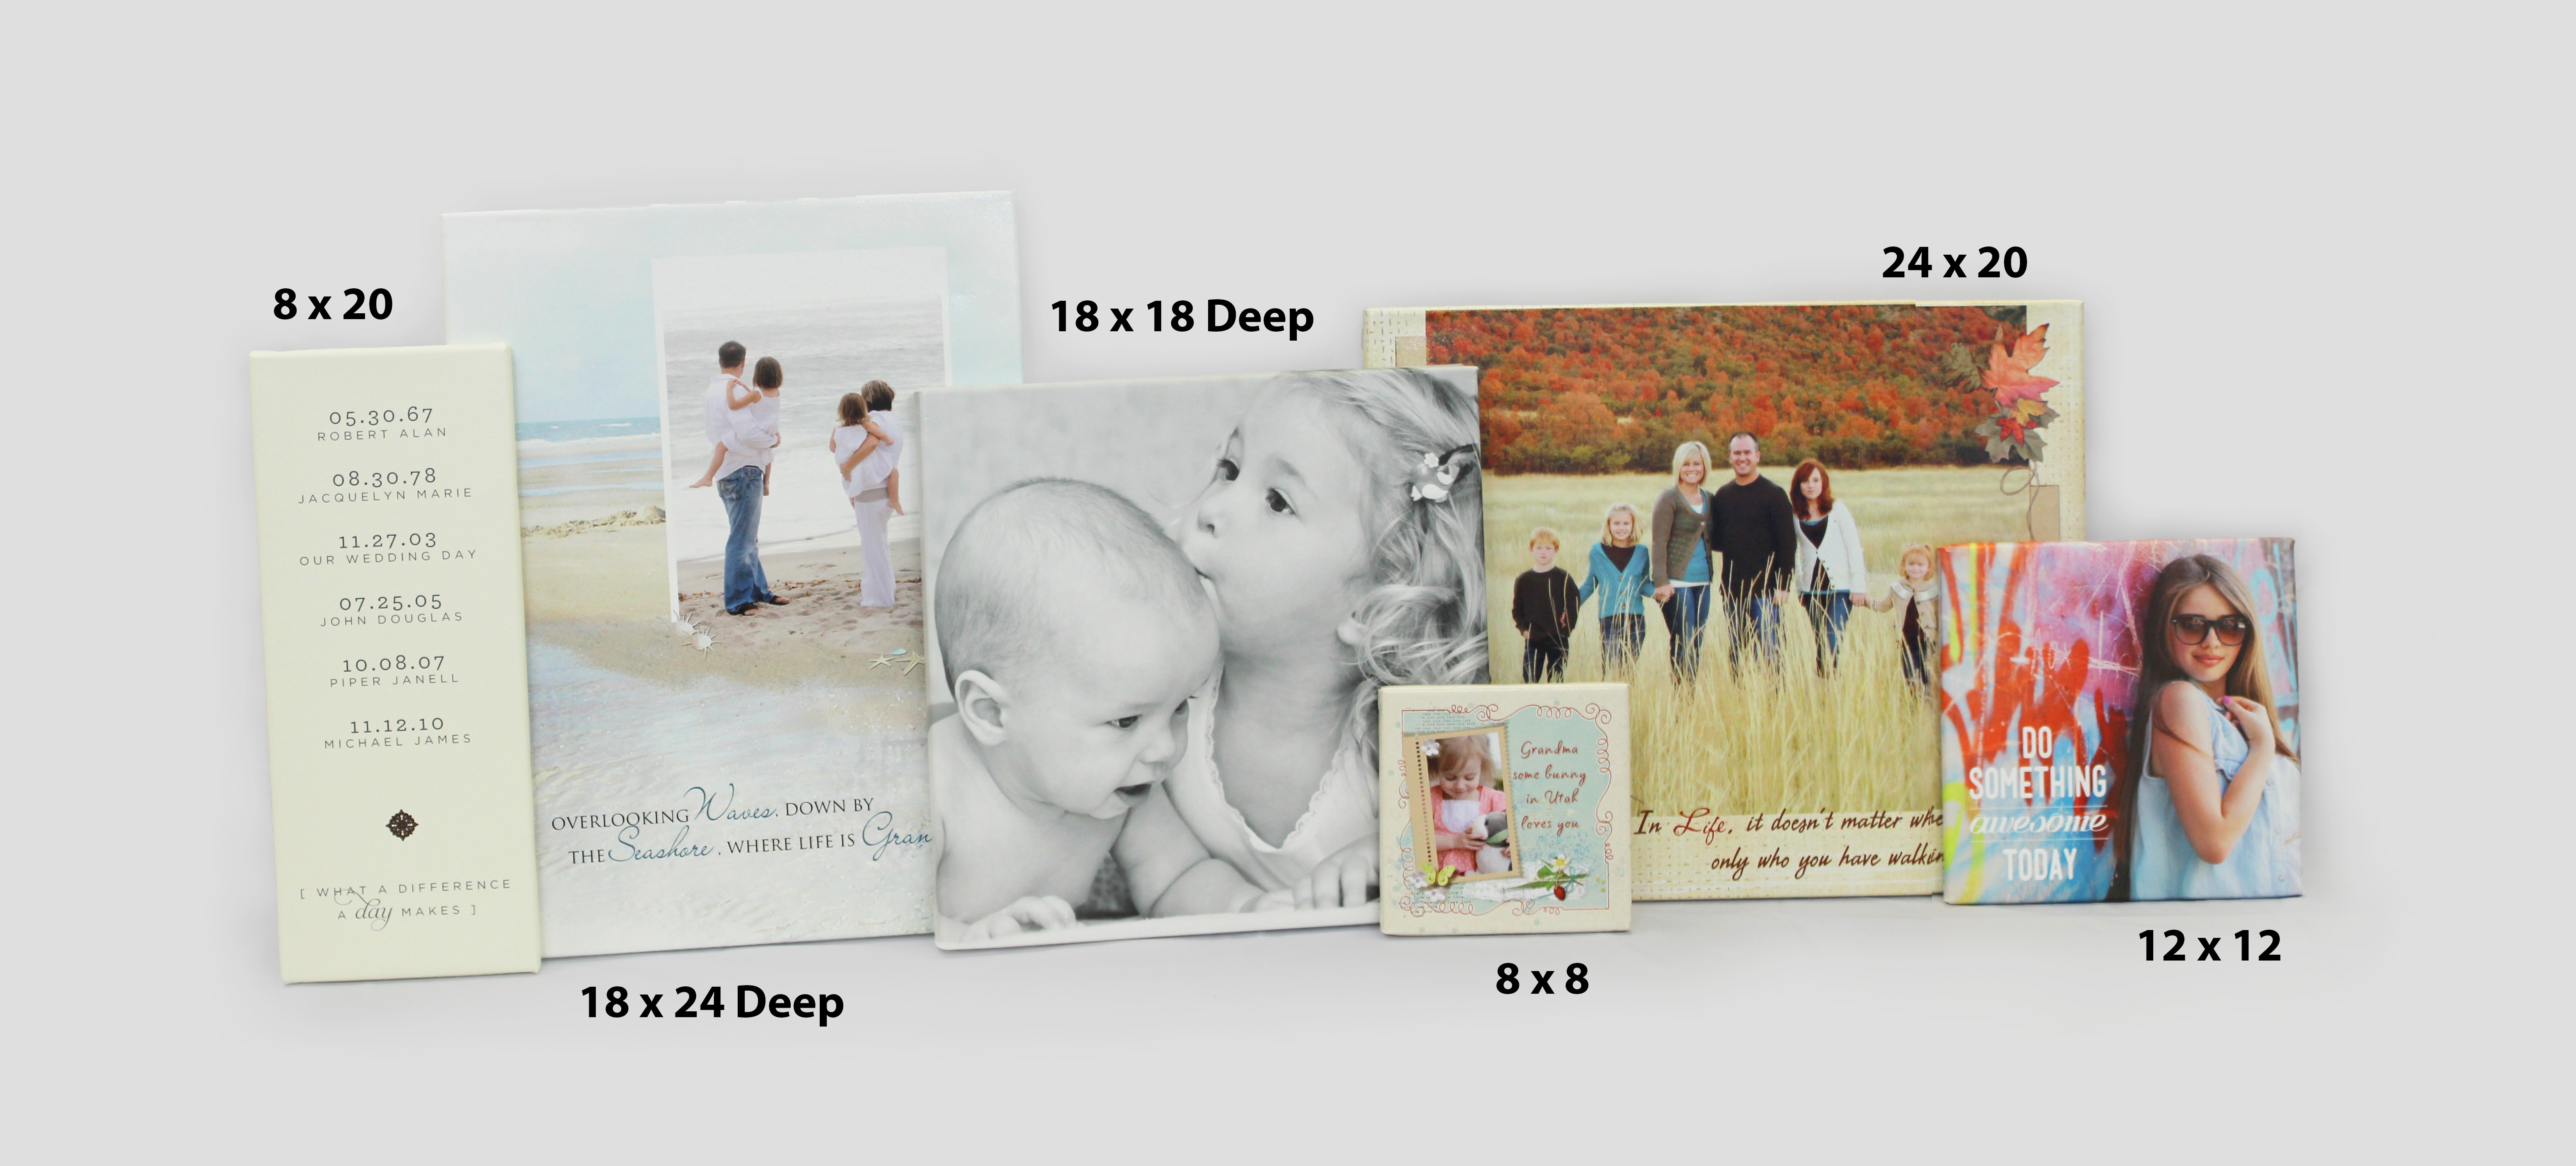
The Canvas sizes are measured in inches. So, a 24 x 20 Wrapped canvas is 24 inches wide and 20 inches tall. All of our rectangular Canvases can be designed in either a landscape or portrait orientation.
Note: Many of our different canvas sizes share identical measurements on one side, so that they can be easily aligned on a wall to create a visually-pleasing display. For example, our 8 x 20, 20 x 20, 16 x 20, and 24 x 20 Wrapped Canvases all share a 20-inch side.
The Design Guide:
When you first open Studio to work on your project, the Design Guide is visible and can be a bit overwhelming. It is important to read and understand the tips and guide areas for each product type. If you have read and understand the tips laid out in the Design Guide, you can hide the tip bubbles by clicking the Design Guide button in the upper right-hand corner of the Studio window.

This is how the Design Guide appears in Studio while you are working on a Wrapped Canvas*. The tip bubbles are fairly simple for this type of product. Here is a breakdown of each design tip:

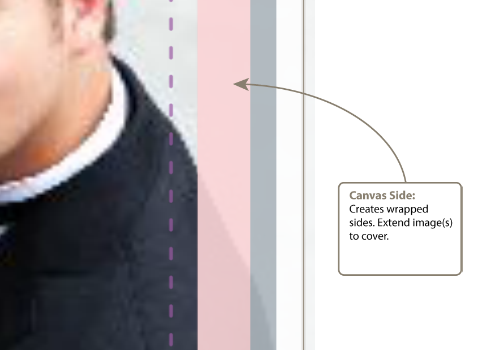
The most important thing to know when designing a custom Wrapped Canvas is where to place your design so that it will appear correctly on the front and sides of your finished project. These tip bubbles let you know that the pink shaded area on each side of the design space in Studio is what will be the outer edges of your finished Canvas after it is printed and wrapped on its wooden frame.
As our canvases are wrapped by hand, placement is not 100% precise. That's why we have the Safe Area, the Bleed Area, and the marked Canvas Sides to help you with the design process.

Along with the pink shaded area, there is also a grey shaded border, which shows the full-bleed area of the design space in Studio. If your design does not extend fully past this area, your wrapped canvas may have a white edge. The square grey area in each corner will be folded when the printed canvas is wrapped around its frame. This area will generally not be visible on your finished project.
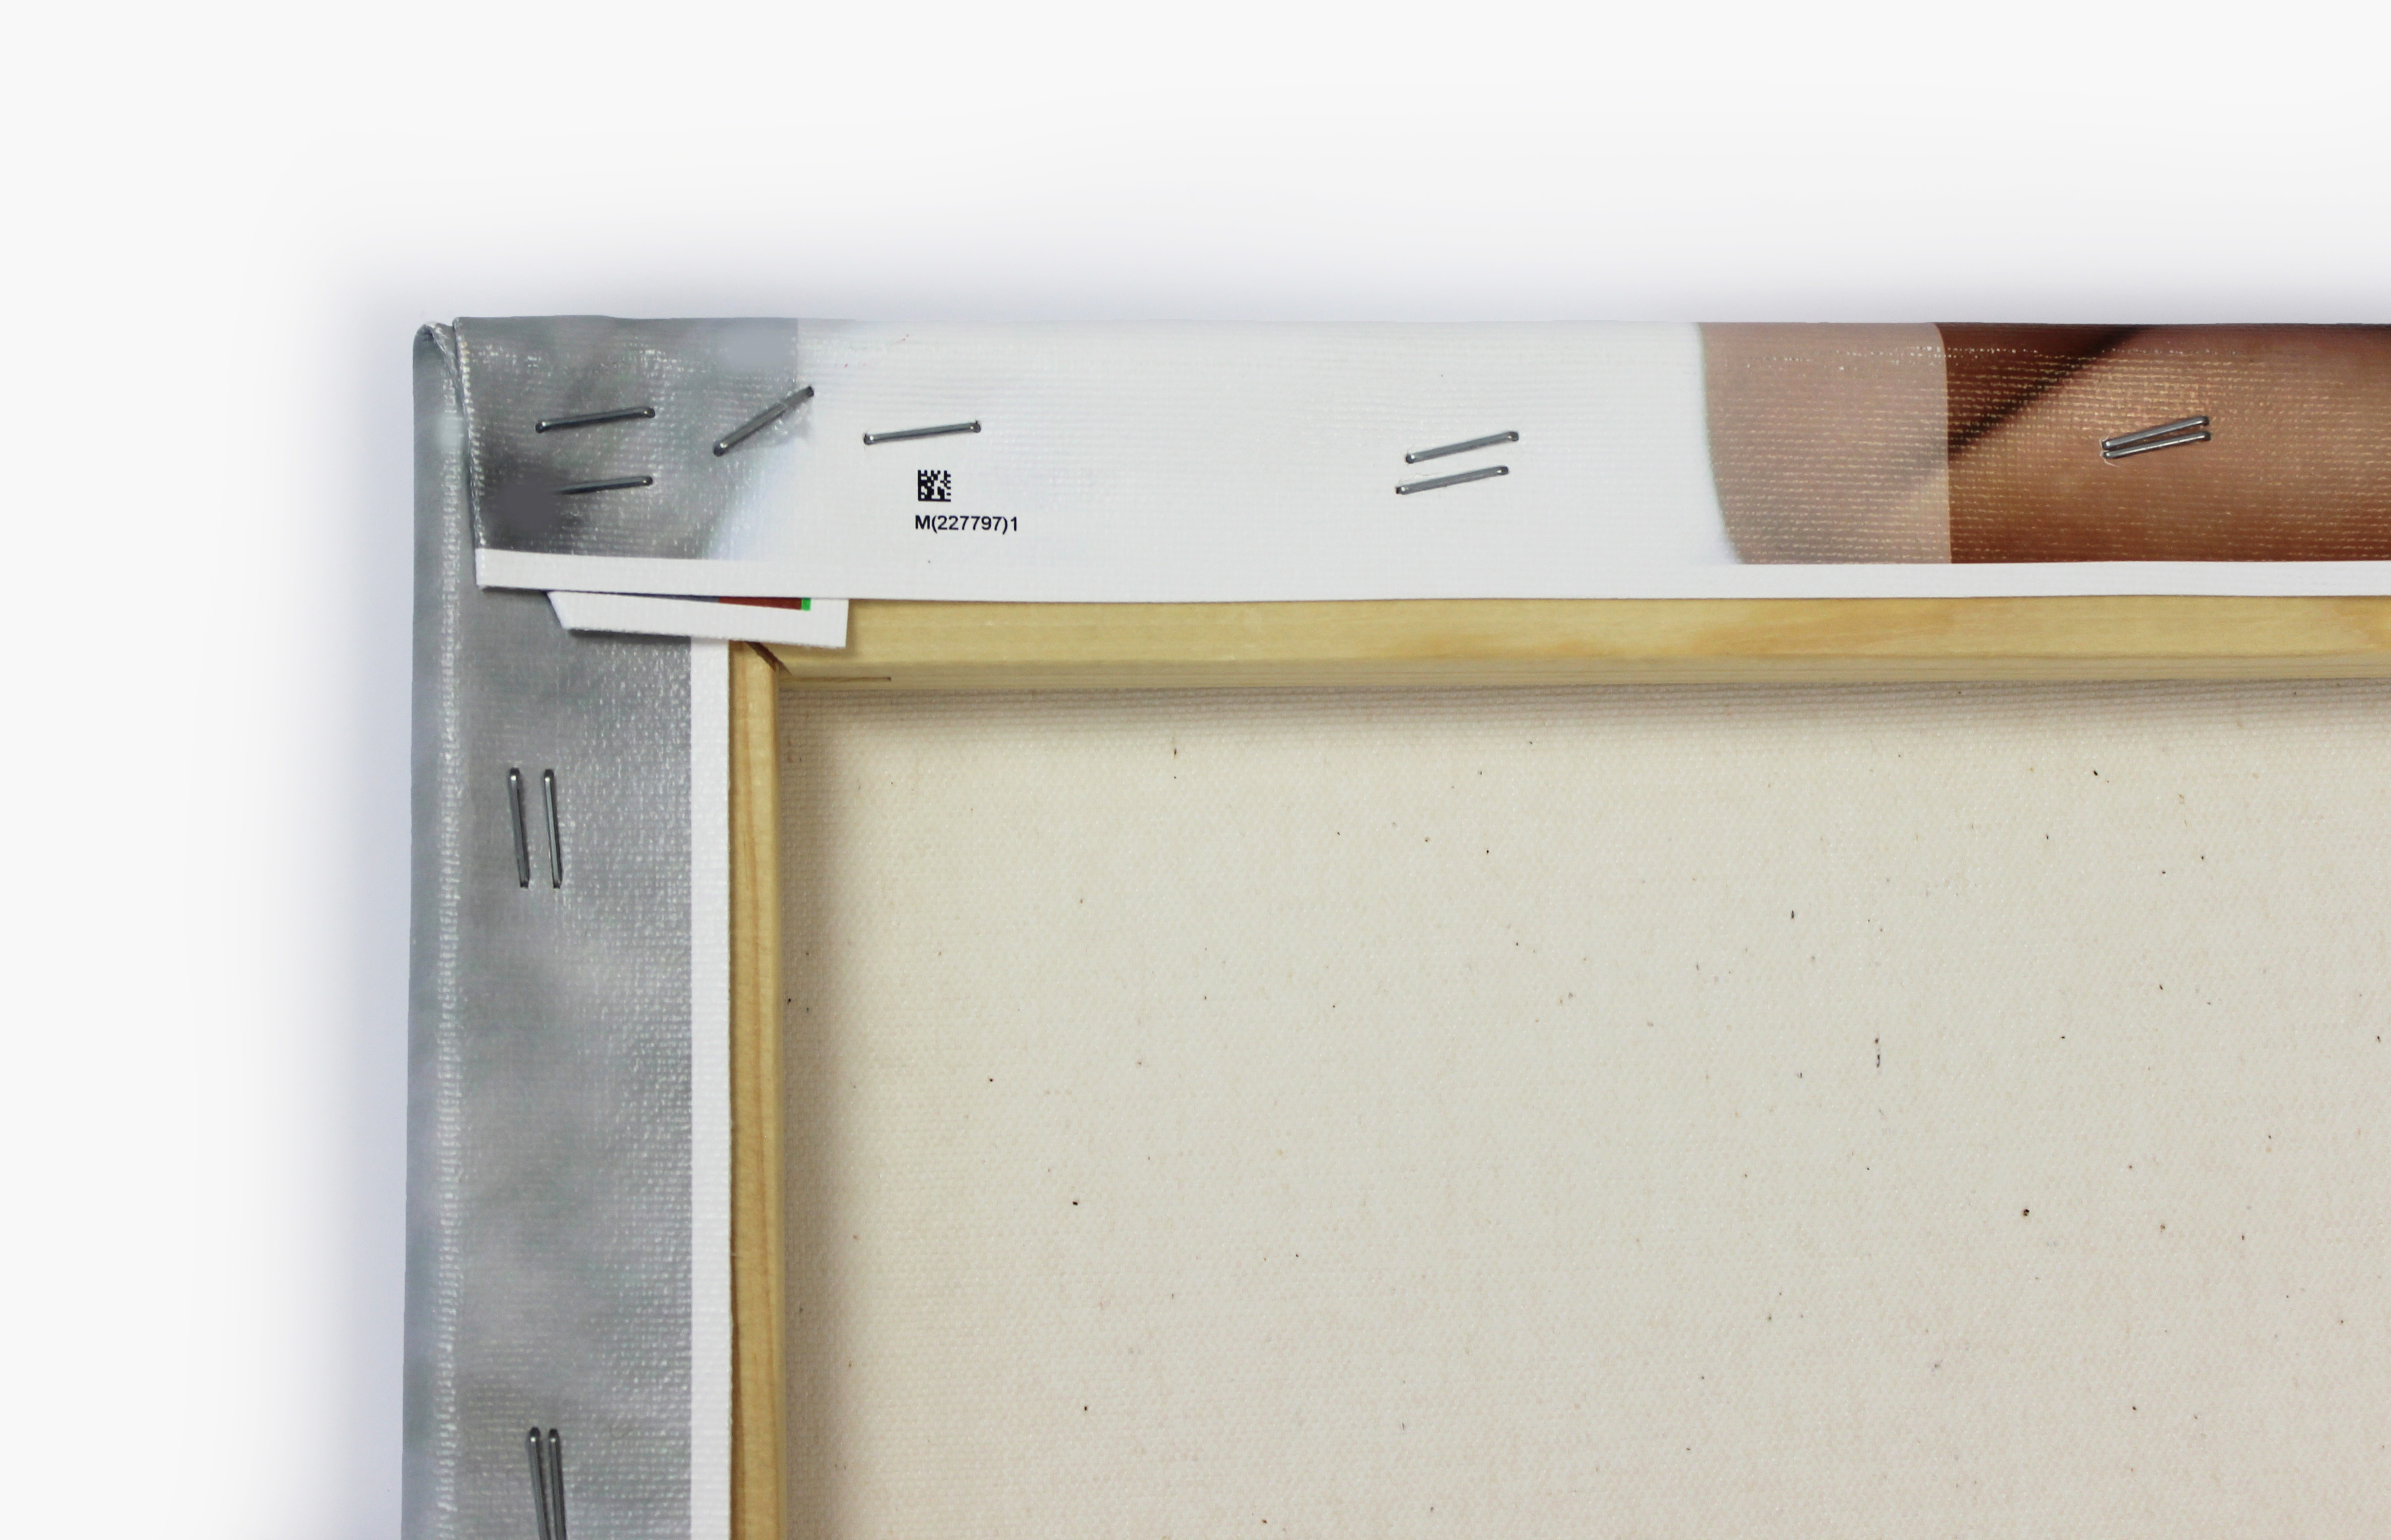
This is what the back of each corner of your canvas will look like after production. The corners are neatly folded so that the design wraps smoothly around each side of the wooden frame. If you design your wrapped canvas so that the background or image extends past the full-bleed area, your design will wrap around the back of this with a thin white edge.
Note: There will be a small barcode on the back of your canvas, as shown above, but that barcode is for production purposes only.
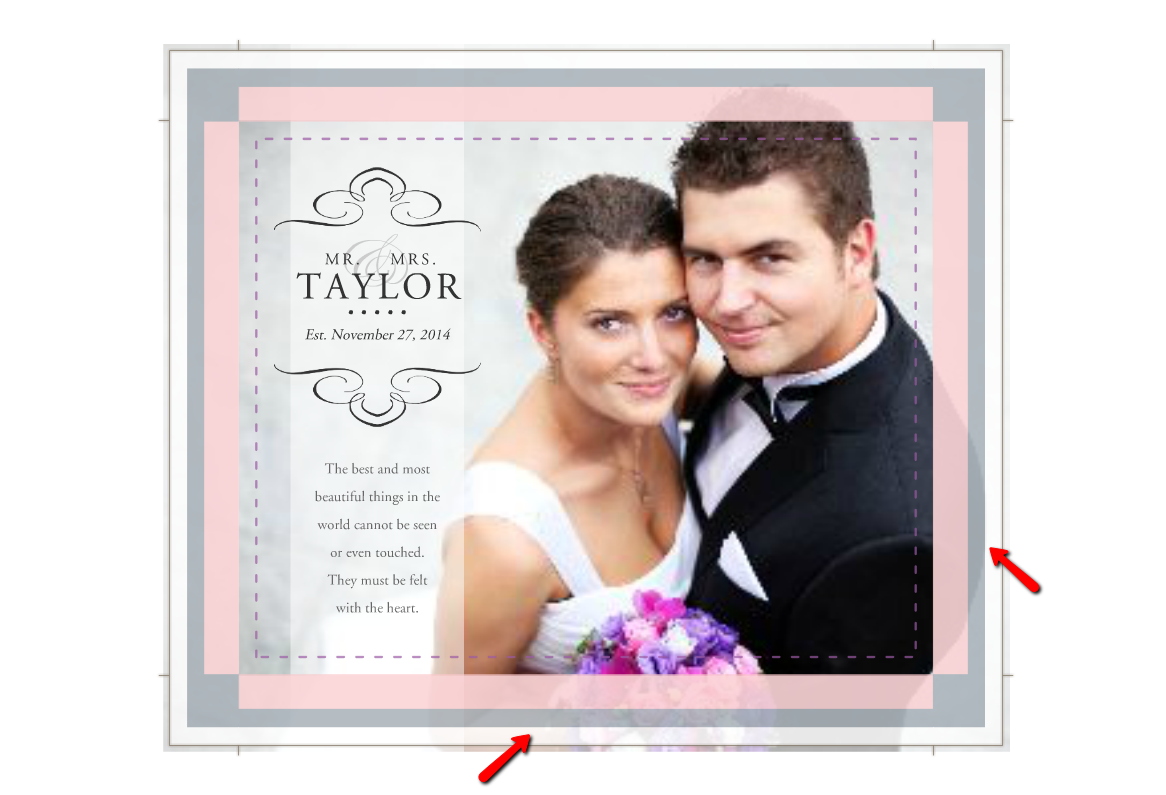
As you can see in this screenshot, the pink and grey areas are shaded so that you can still see your photo or background. This makes it easy to ensure that your design extends through the full-bleed area of the design space. These shaded areas of the design guide will not print on your finished canvas.
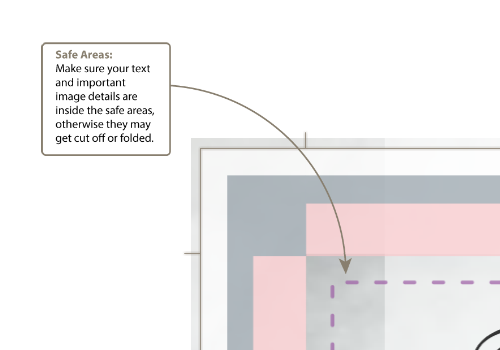
The Safe Area is designated by a purple dashed line around the edge of the design space in Studio. On Wrapped Canvases, it falls about 1/2 inch to the inside of the front area of the canvas. Projects look better when words, photos and borders aren't sitting right on the edge of the canvas face or unintentionally wrapping around the edge of the canvas. To avoid this, keep text, photos, and borders well to the INSIDE of the safe area.
Standard vs. Deep Wrapped Canvases:
Our 18 x 18 and 18 x 24 Wrapped Canvas products are both wrapped on our deep frames. As opposed to our traditional frames, which are about 3/4 inch thick, the deep frames are nearly 1 1/2 inches thick. This gives a slightly more dramatic effect to the canvas when displayed on a wall.

*Note: The photos and screenshots in this article show a 20 x 16 Wrapped Canvas, but all information is relative to every Wrapped Canvas size that we offer.
0 Comments